Newsletter setup
The theme has three subscribe spots:
- The homepage subscribe band at the bottom of the front page
- The blog page subscribe band at the bottom of the blog index (
/blog/) — shares the same Customizer settings as the homepage band, edit once and it updates both - The blog sidebar newsletter card on single blog posts
All three are wired through the WordPress Customizer — paste a form shortcode, publish, done.
This guide covers the recommended flow: Fluent CRM for the contact list, Fluent Forms for the form itself, with Fluent CRM integration wired into the form so submissions land as contacts.
What you'll end up with
- A Newsletter list inside Fluent CRM
- A Fluent Forms subscribe form that pushes submissions into that list
- The same shortcode pasted into the homepage/blog subscribe band and the blog sidebar
- Optional: a Subscribe tag applied to every new contact so you can filter by signup source later
1. Create the list in Fluent CRM
WP admin → FluentCRM → Contacts → Lists
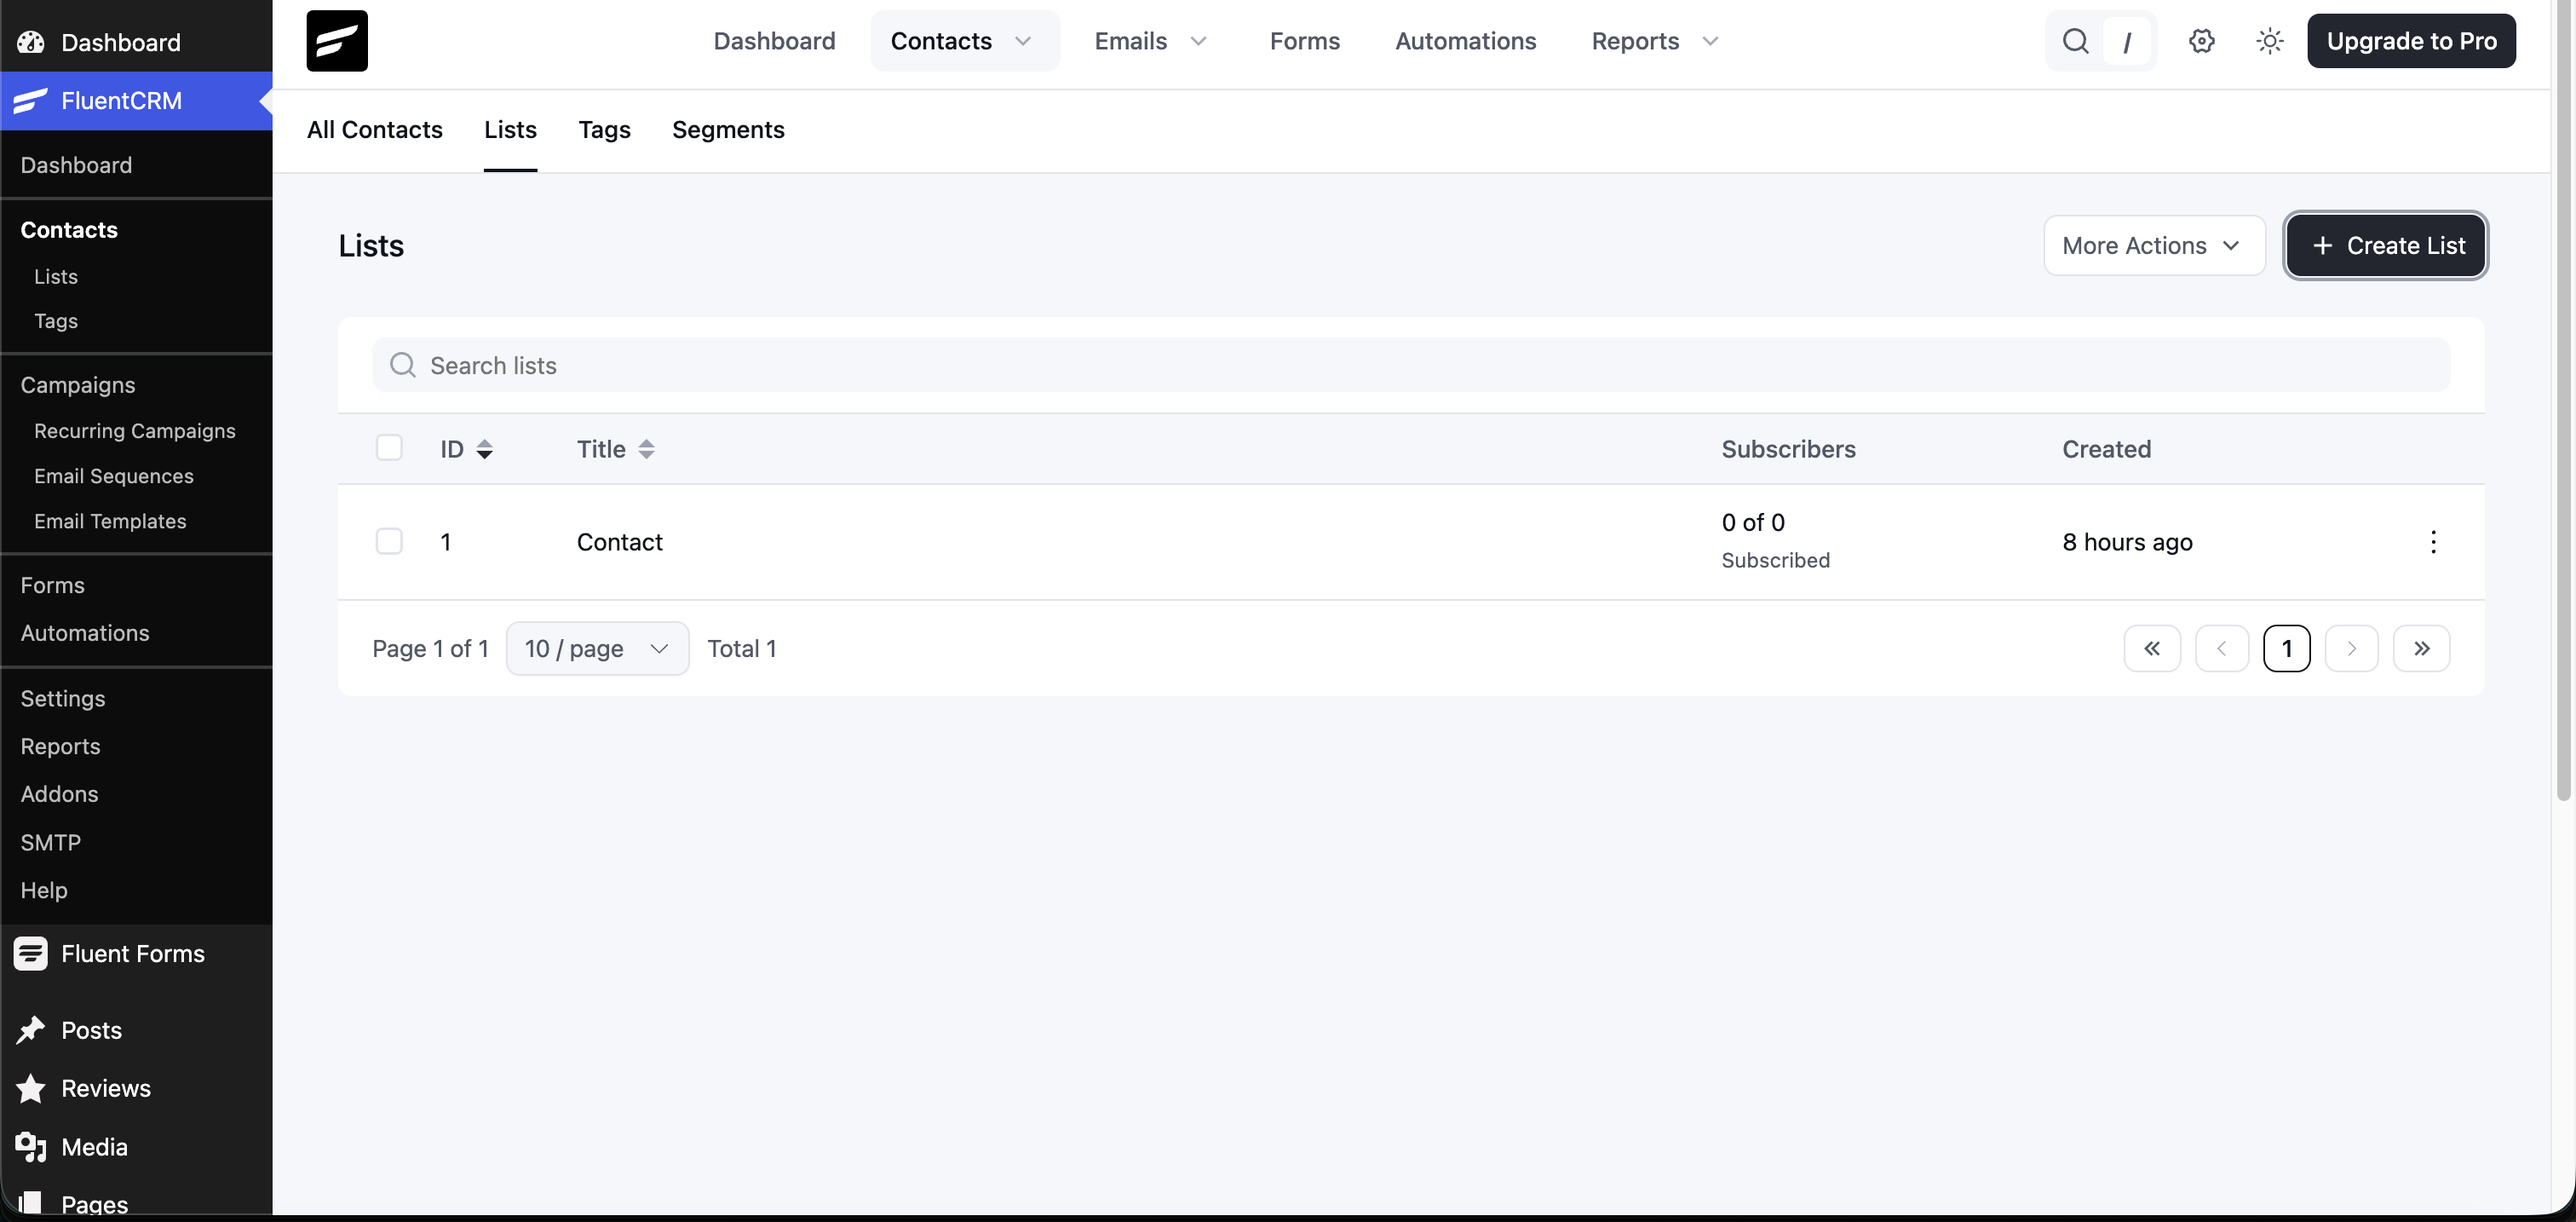
Click + Create List. In the drawer that opens:
- Title →
Newsletter - Slug → auto-fills to
newsletter - Internal Subtitle → optional, leave blank
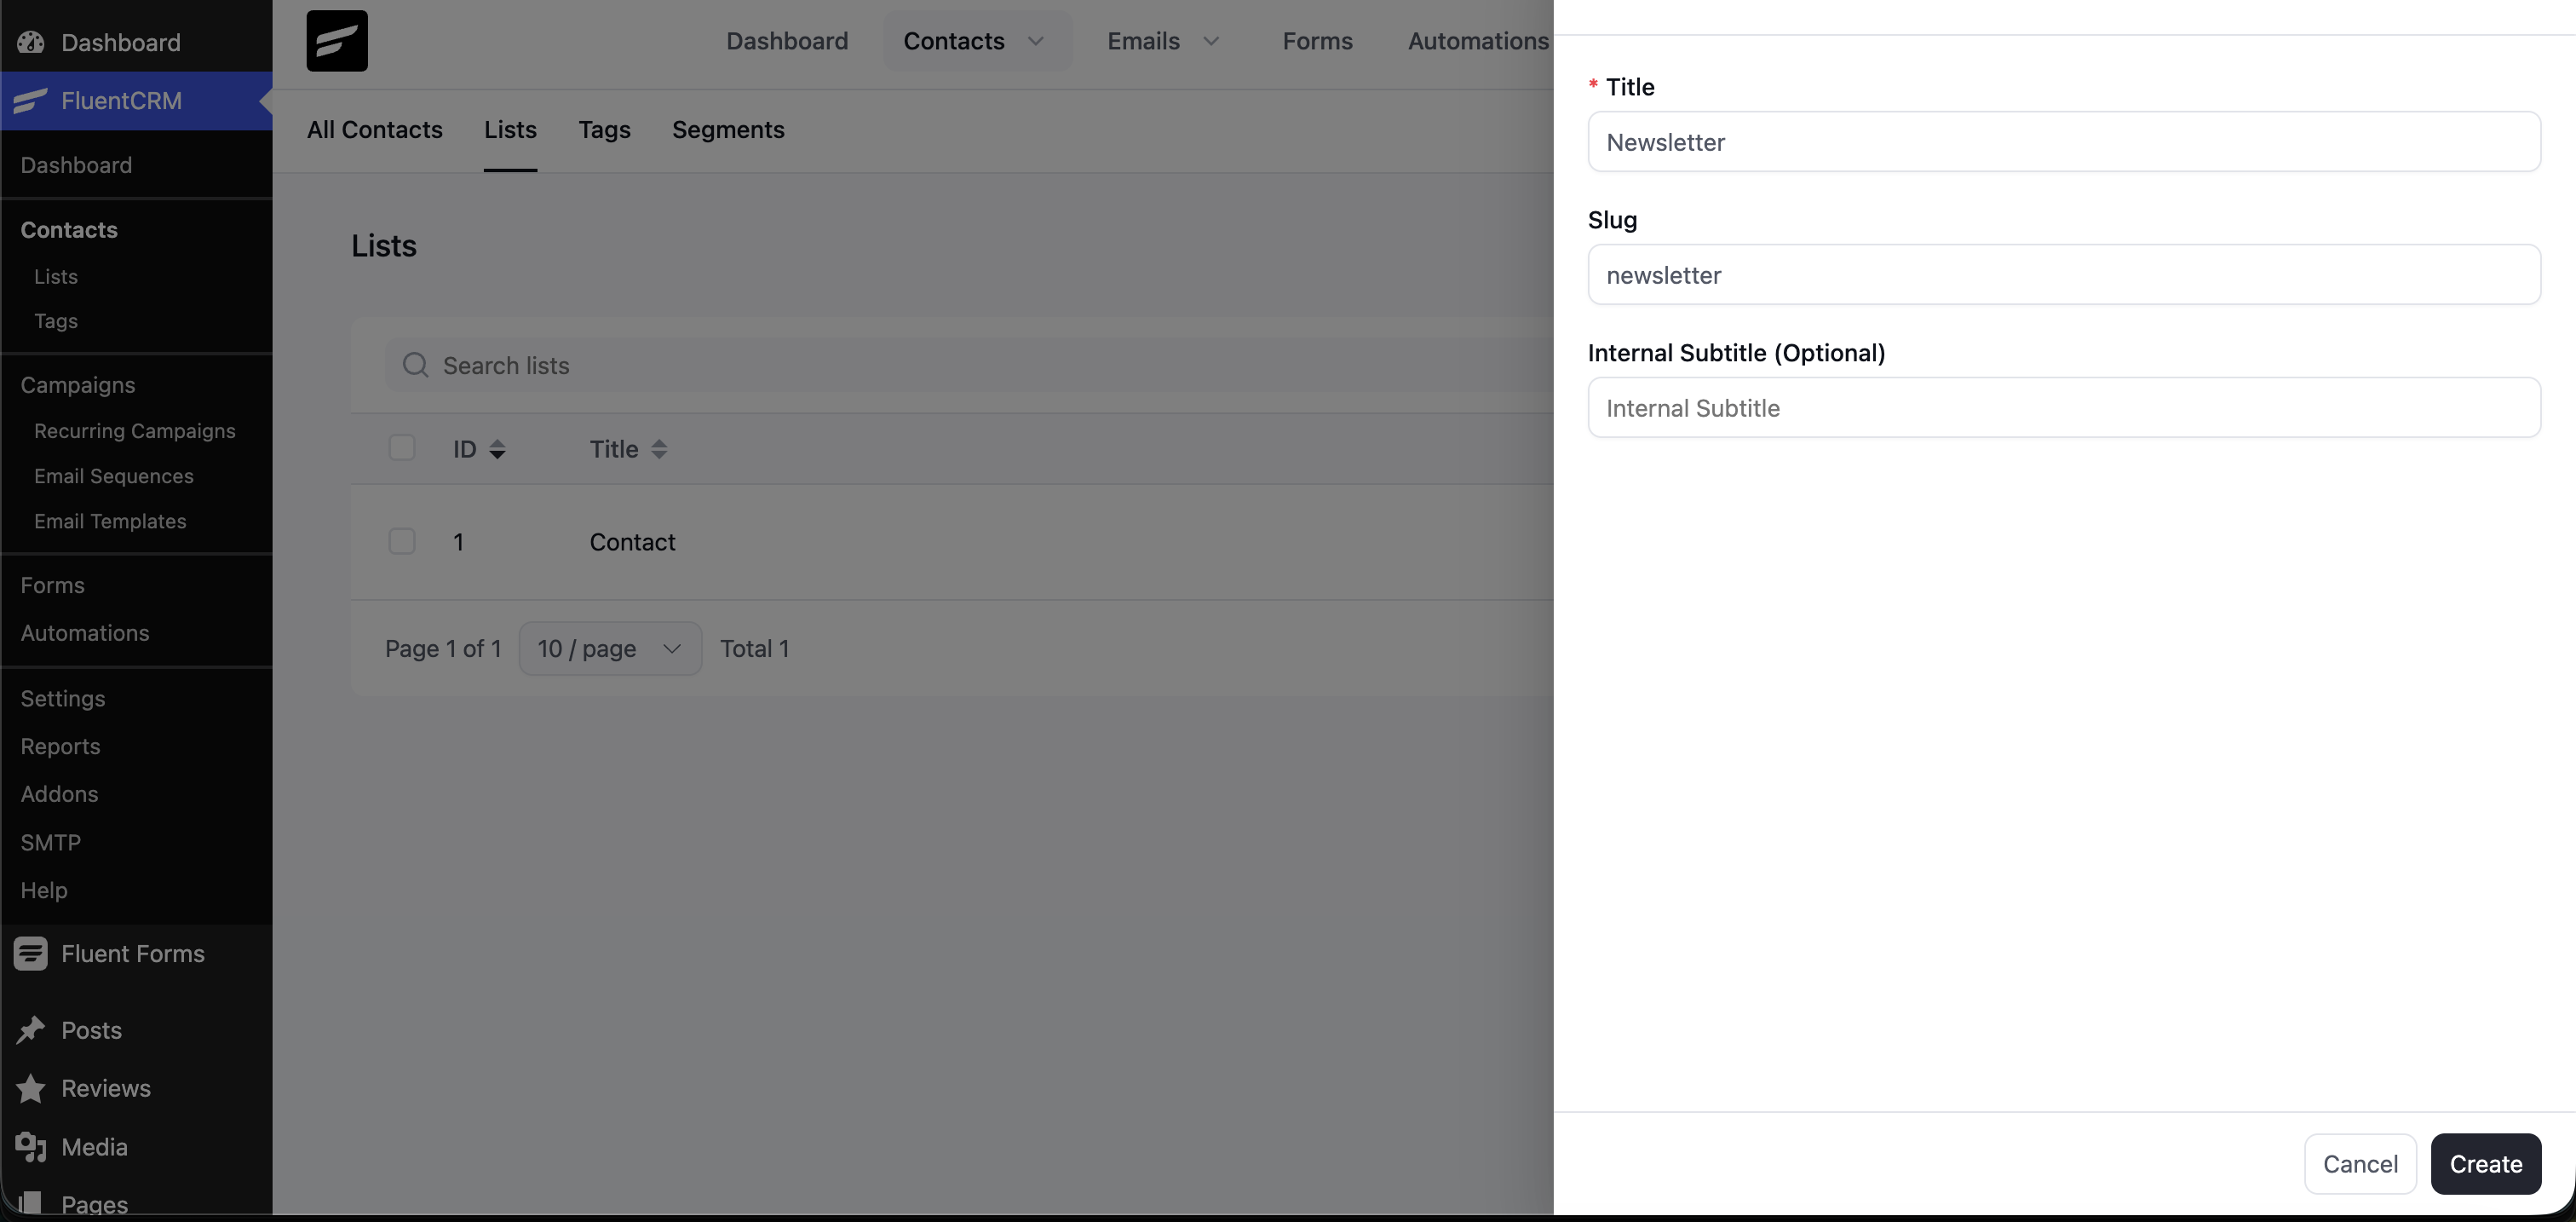
Click Create. The list appears in your Lists table.
2. Create the signup form in Fluent Forms
WP admin → Fluent Forms → All Forms → + Create a New Form
Fluent Forms shows you a template picker with three opt-in templates:
- Inline Opt-in Form — email + submit on one row
- Simple Opt-in Form — stacked email above submit
- Subscriber Form — email + button, minimal design
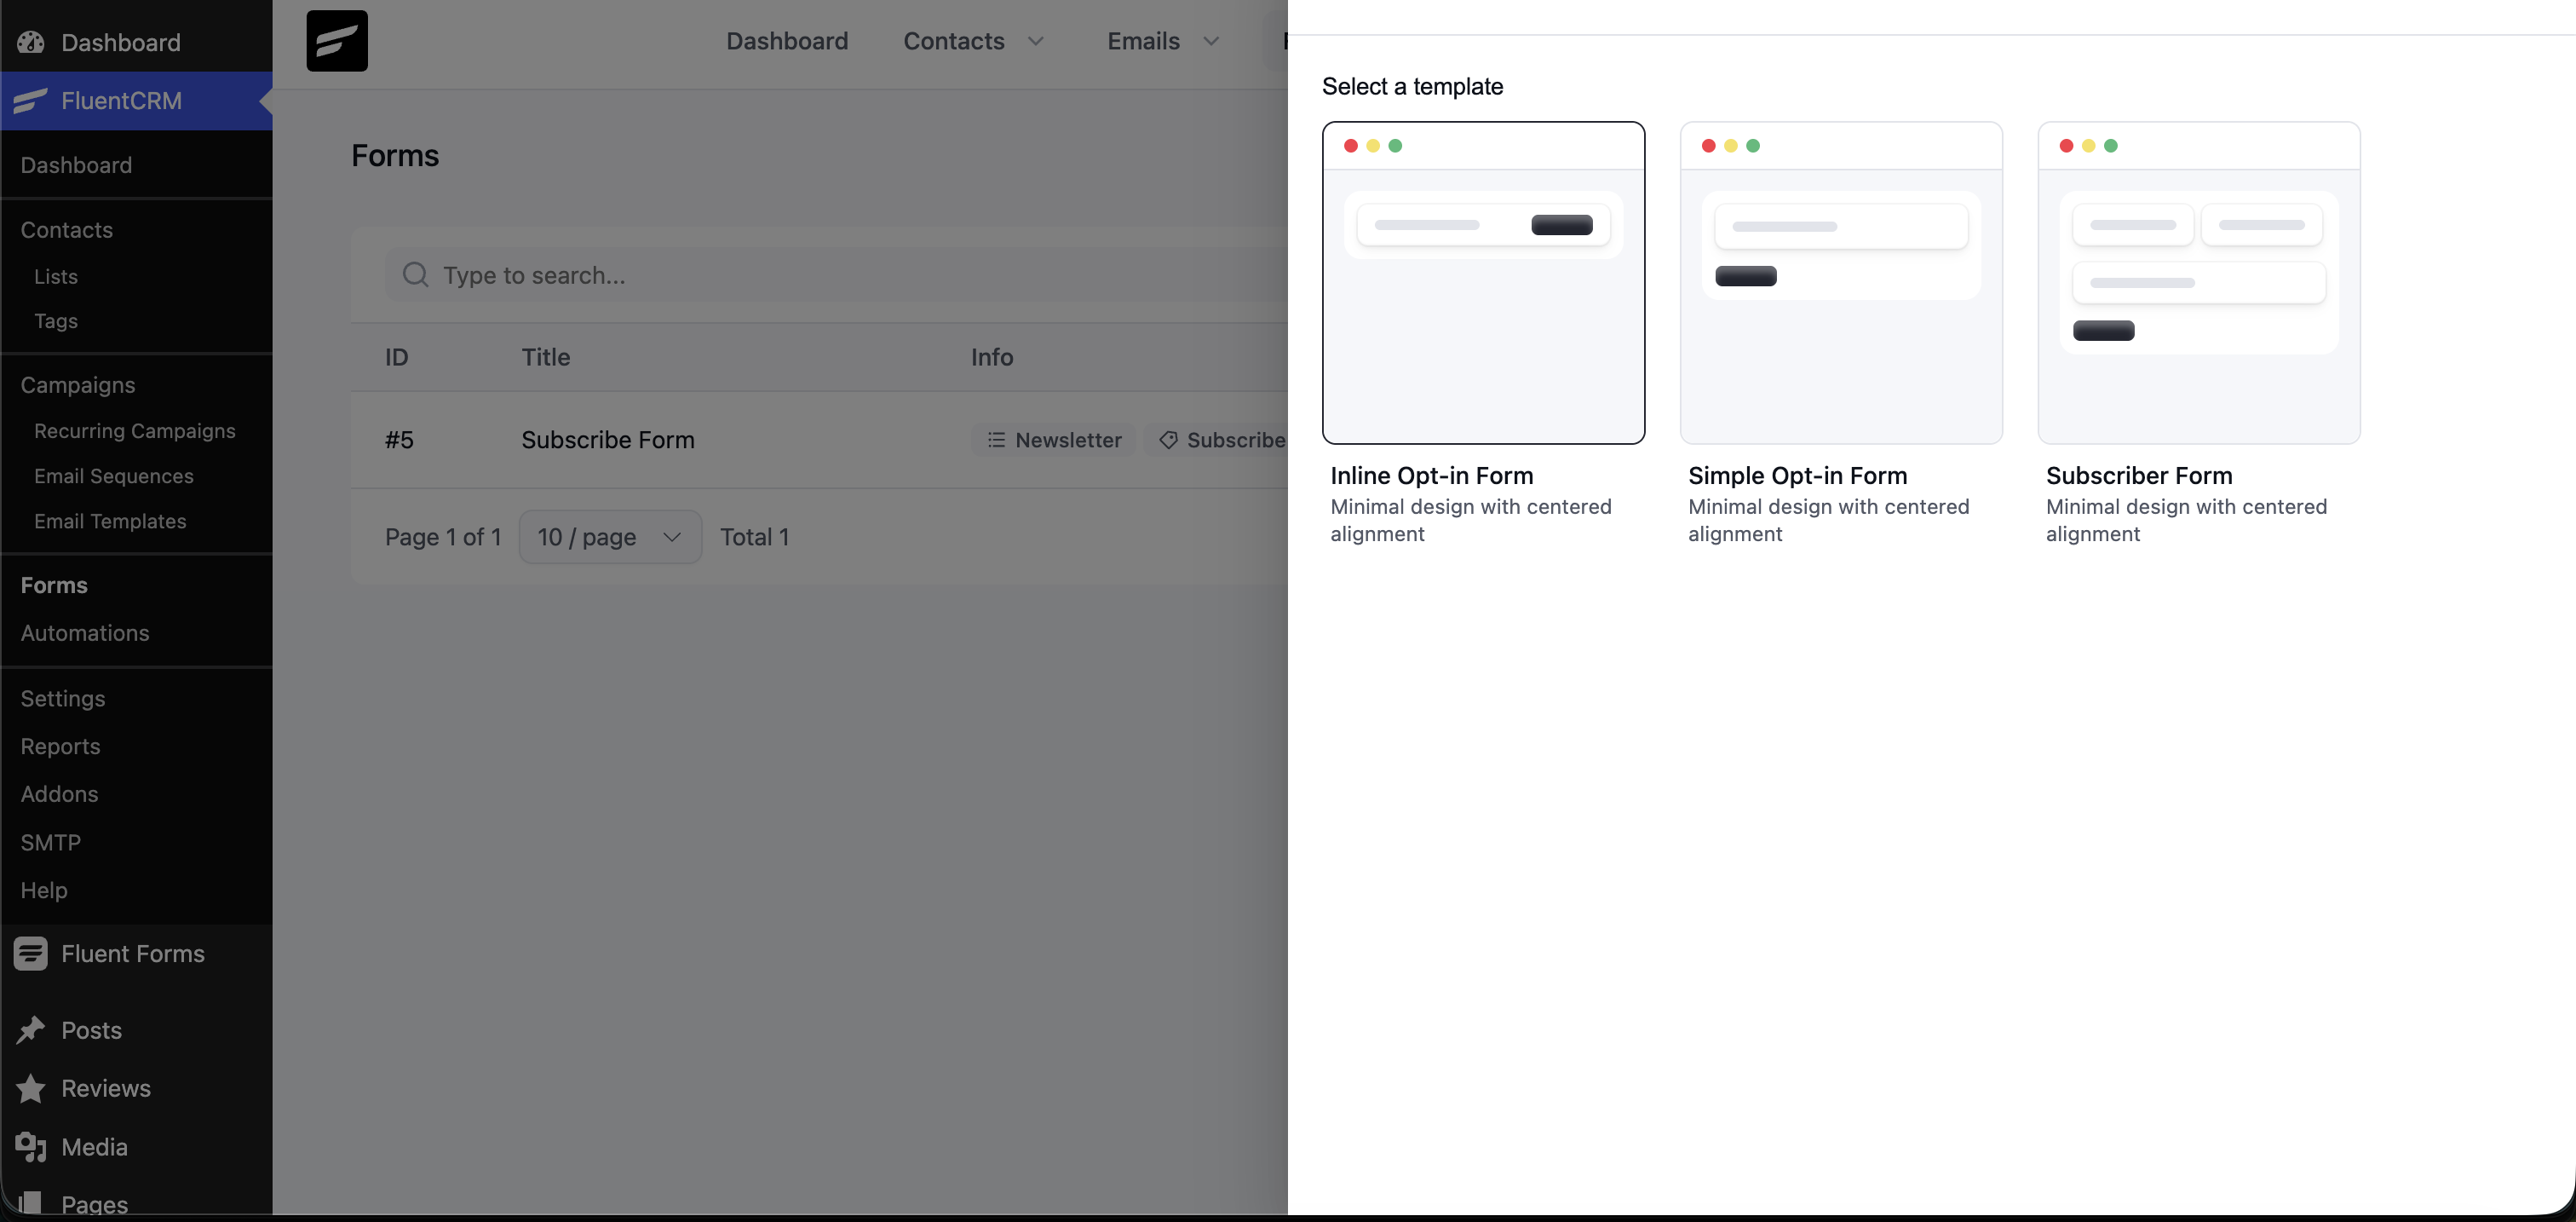
Pick whichever you prefer (Simple or Subscriber both work well). A configuration drawer opens:
- Form Title →
Subscribe Form(or whatever helps you find it later) - Add to List → pick your
Newsletterlist from the dropdown - Add to Tags → optional, add a
Subscribetag (create it inline) so you can filter contacts by source later - Double Opt-in → toggle Enable Double Opt-in Confirmation if you want subscribers to confirm via email before being added
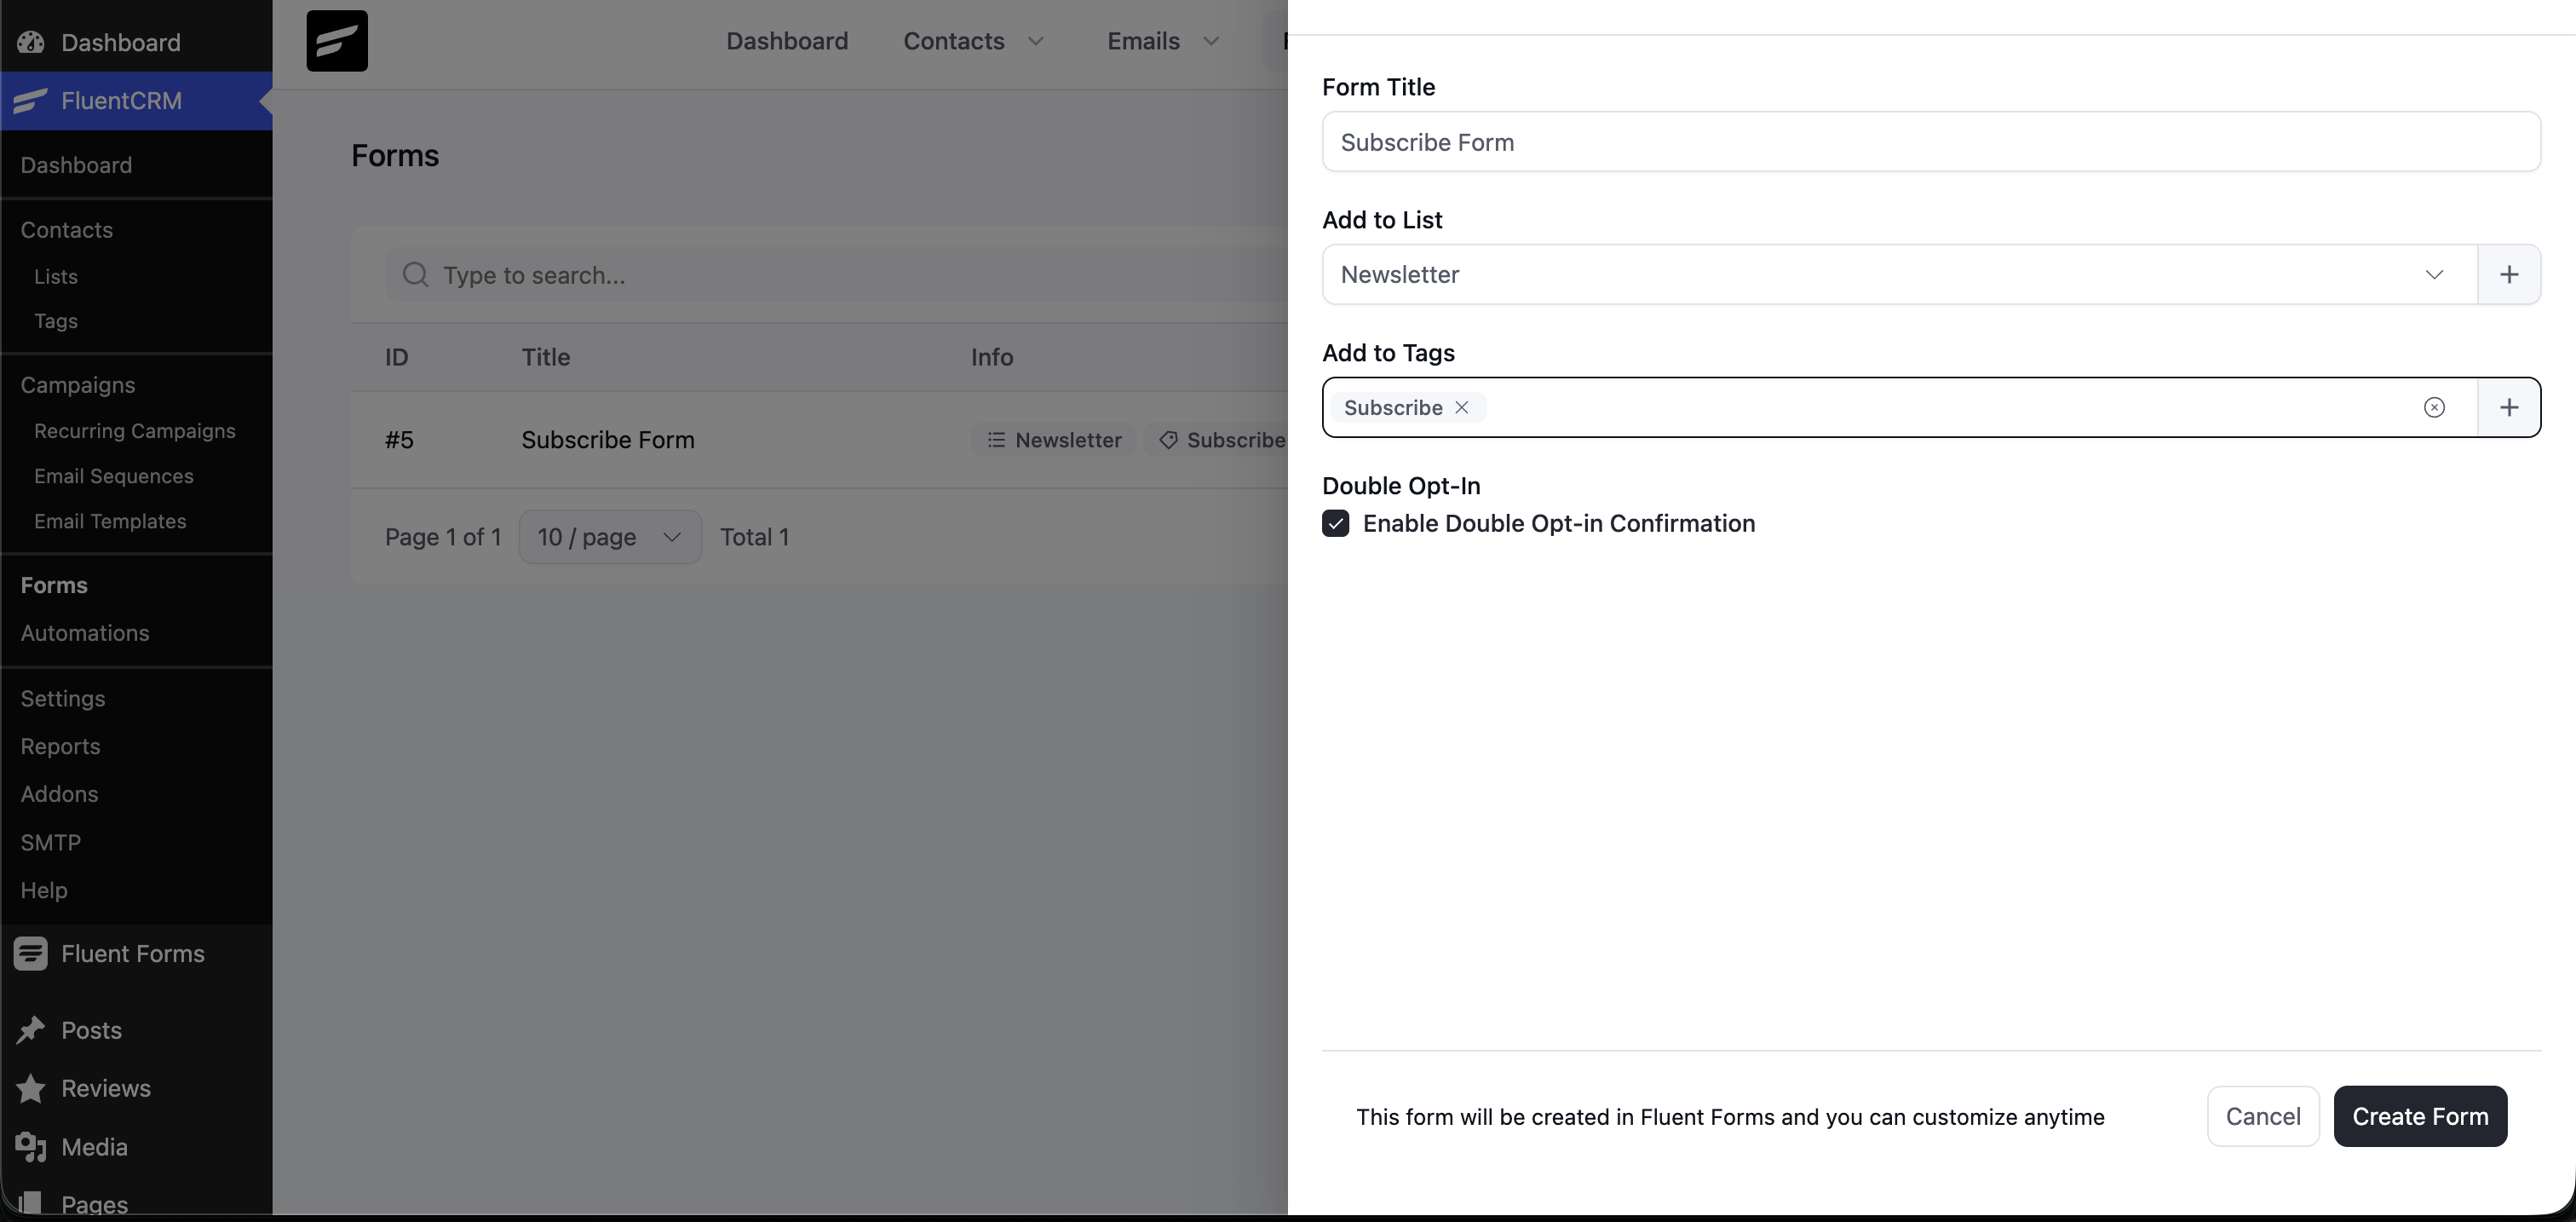
Click Create Form.
3. Copy the shortcode
After the form is created, you land on the Forms list. Your new form has a Shortcode column showing something like [fluentform id="5"] — the number is your form's ID.
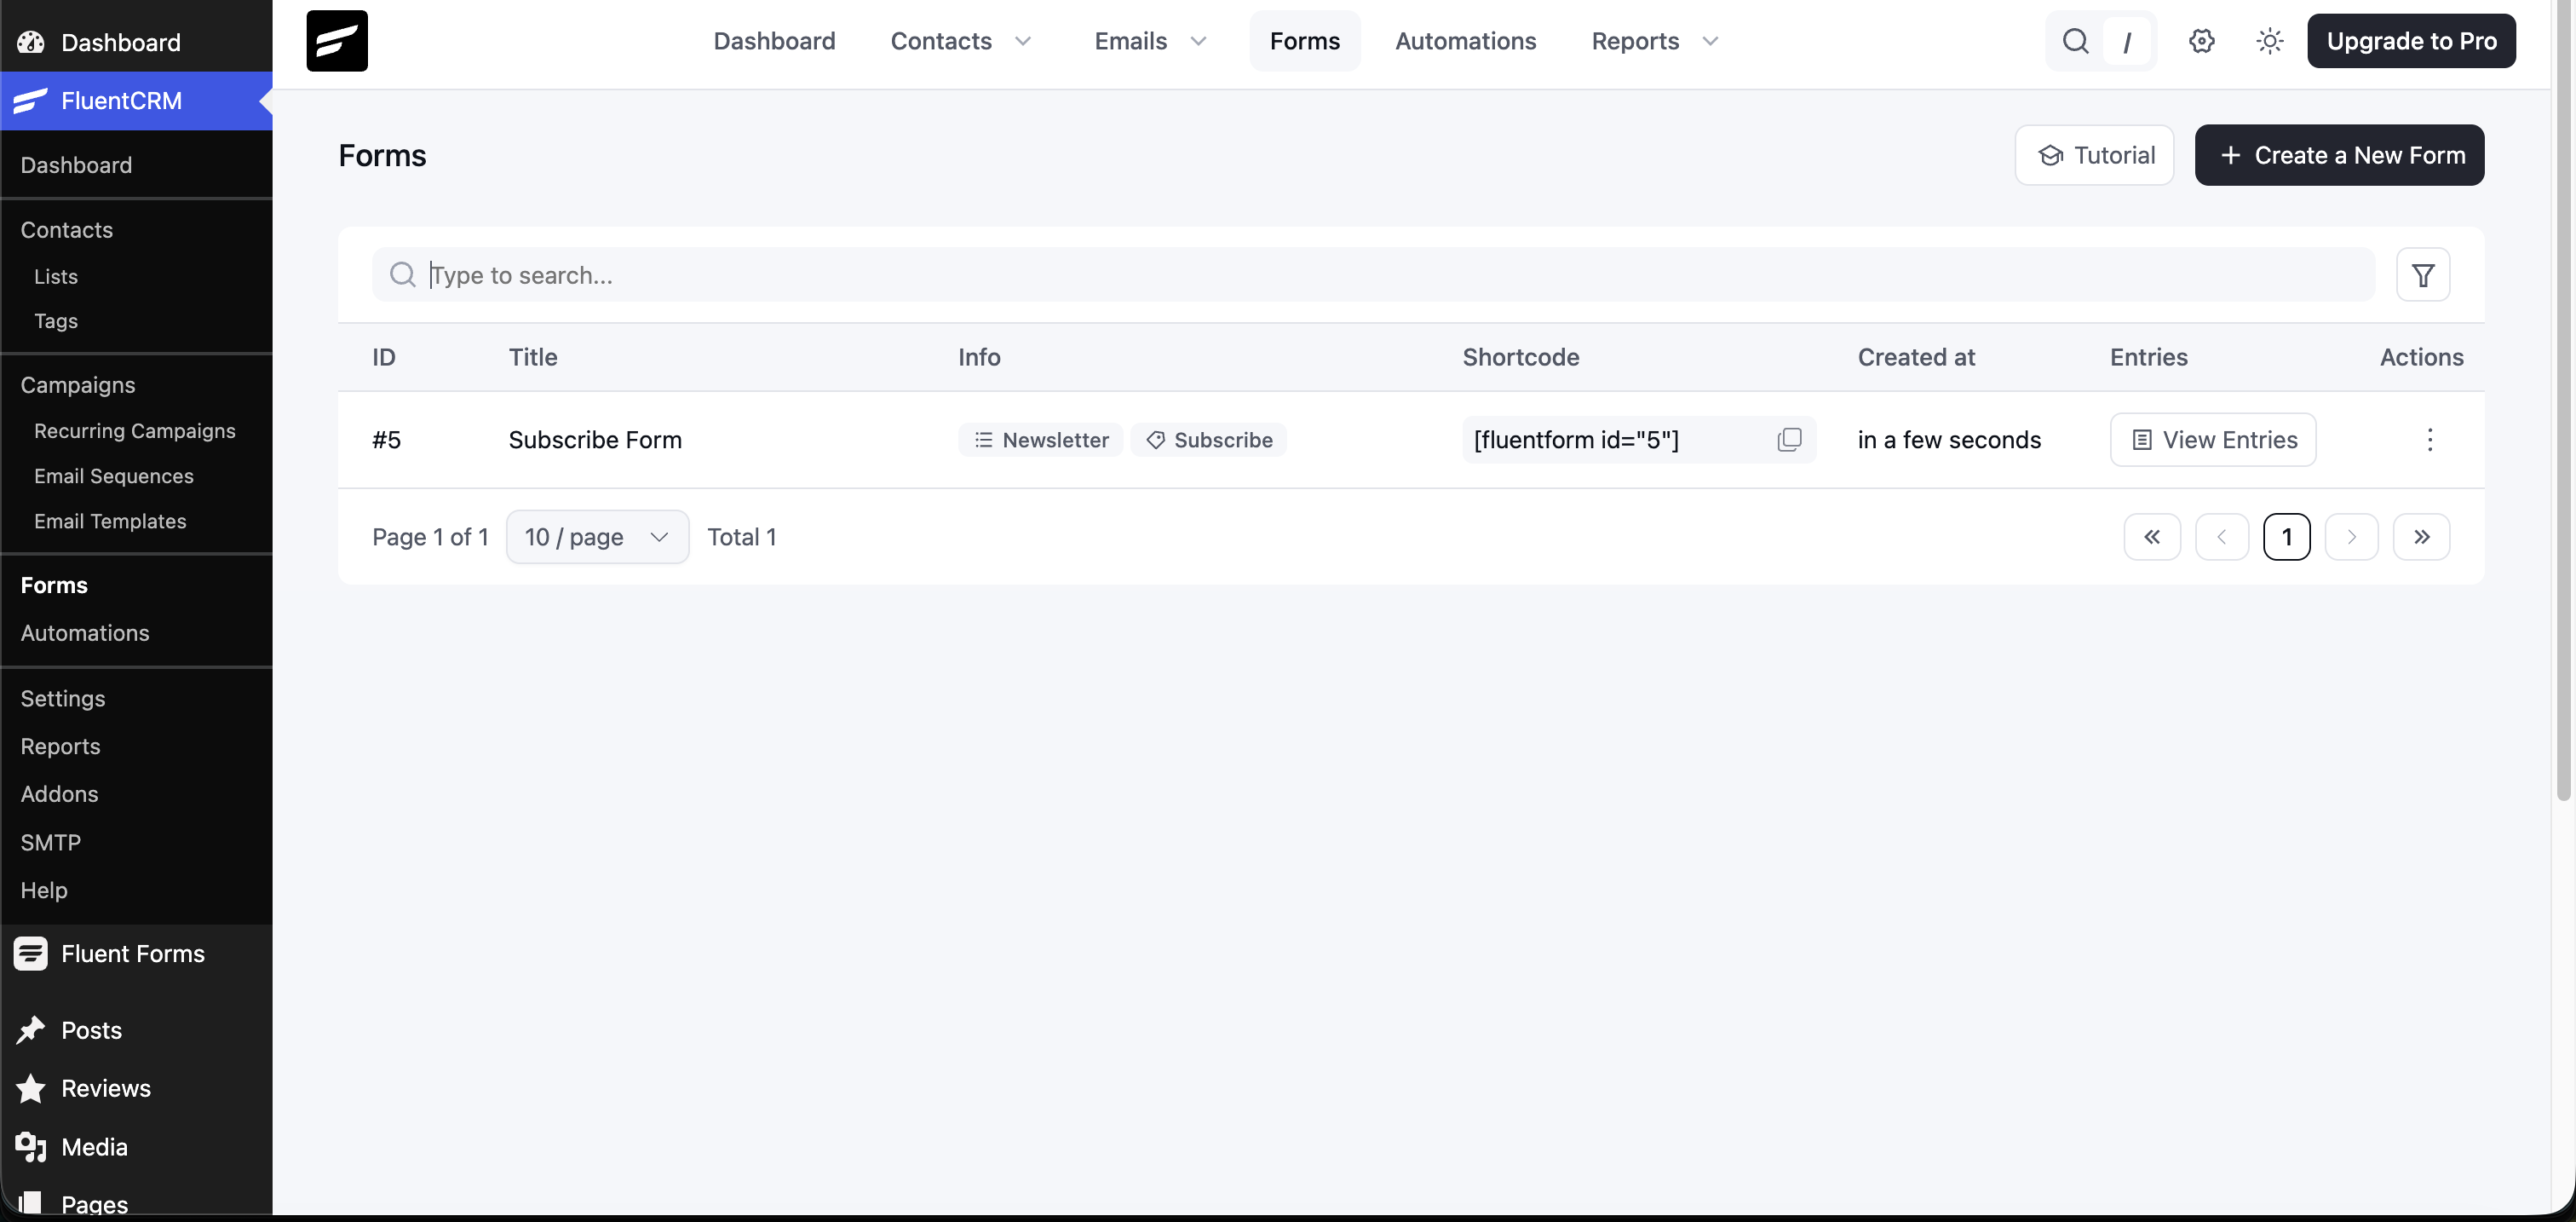
Click the shortcode to copy it, or select and copy manually.
TIP
Every form has its own unique ID. Yours may not be 5. Just make sure the ID in the shortcode matches the form you just created.
4. Wire it into the homepage + blog subscribe section
WP admin → Appearance → Customize
In the Customizer sidebar, scroll to Homepage Subscribe.
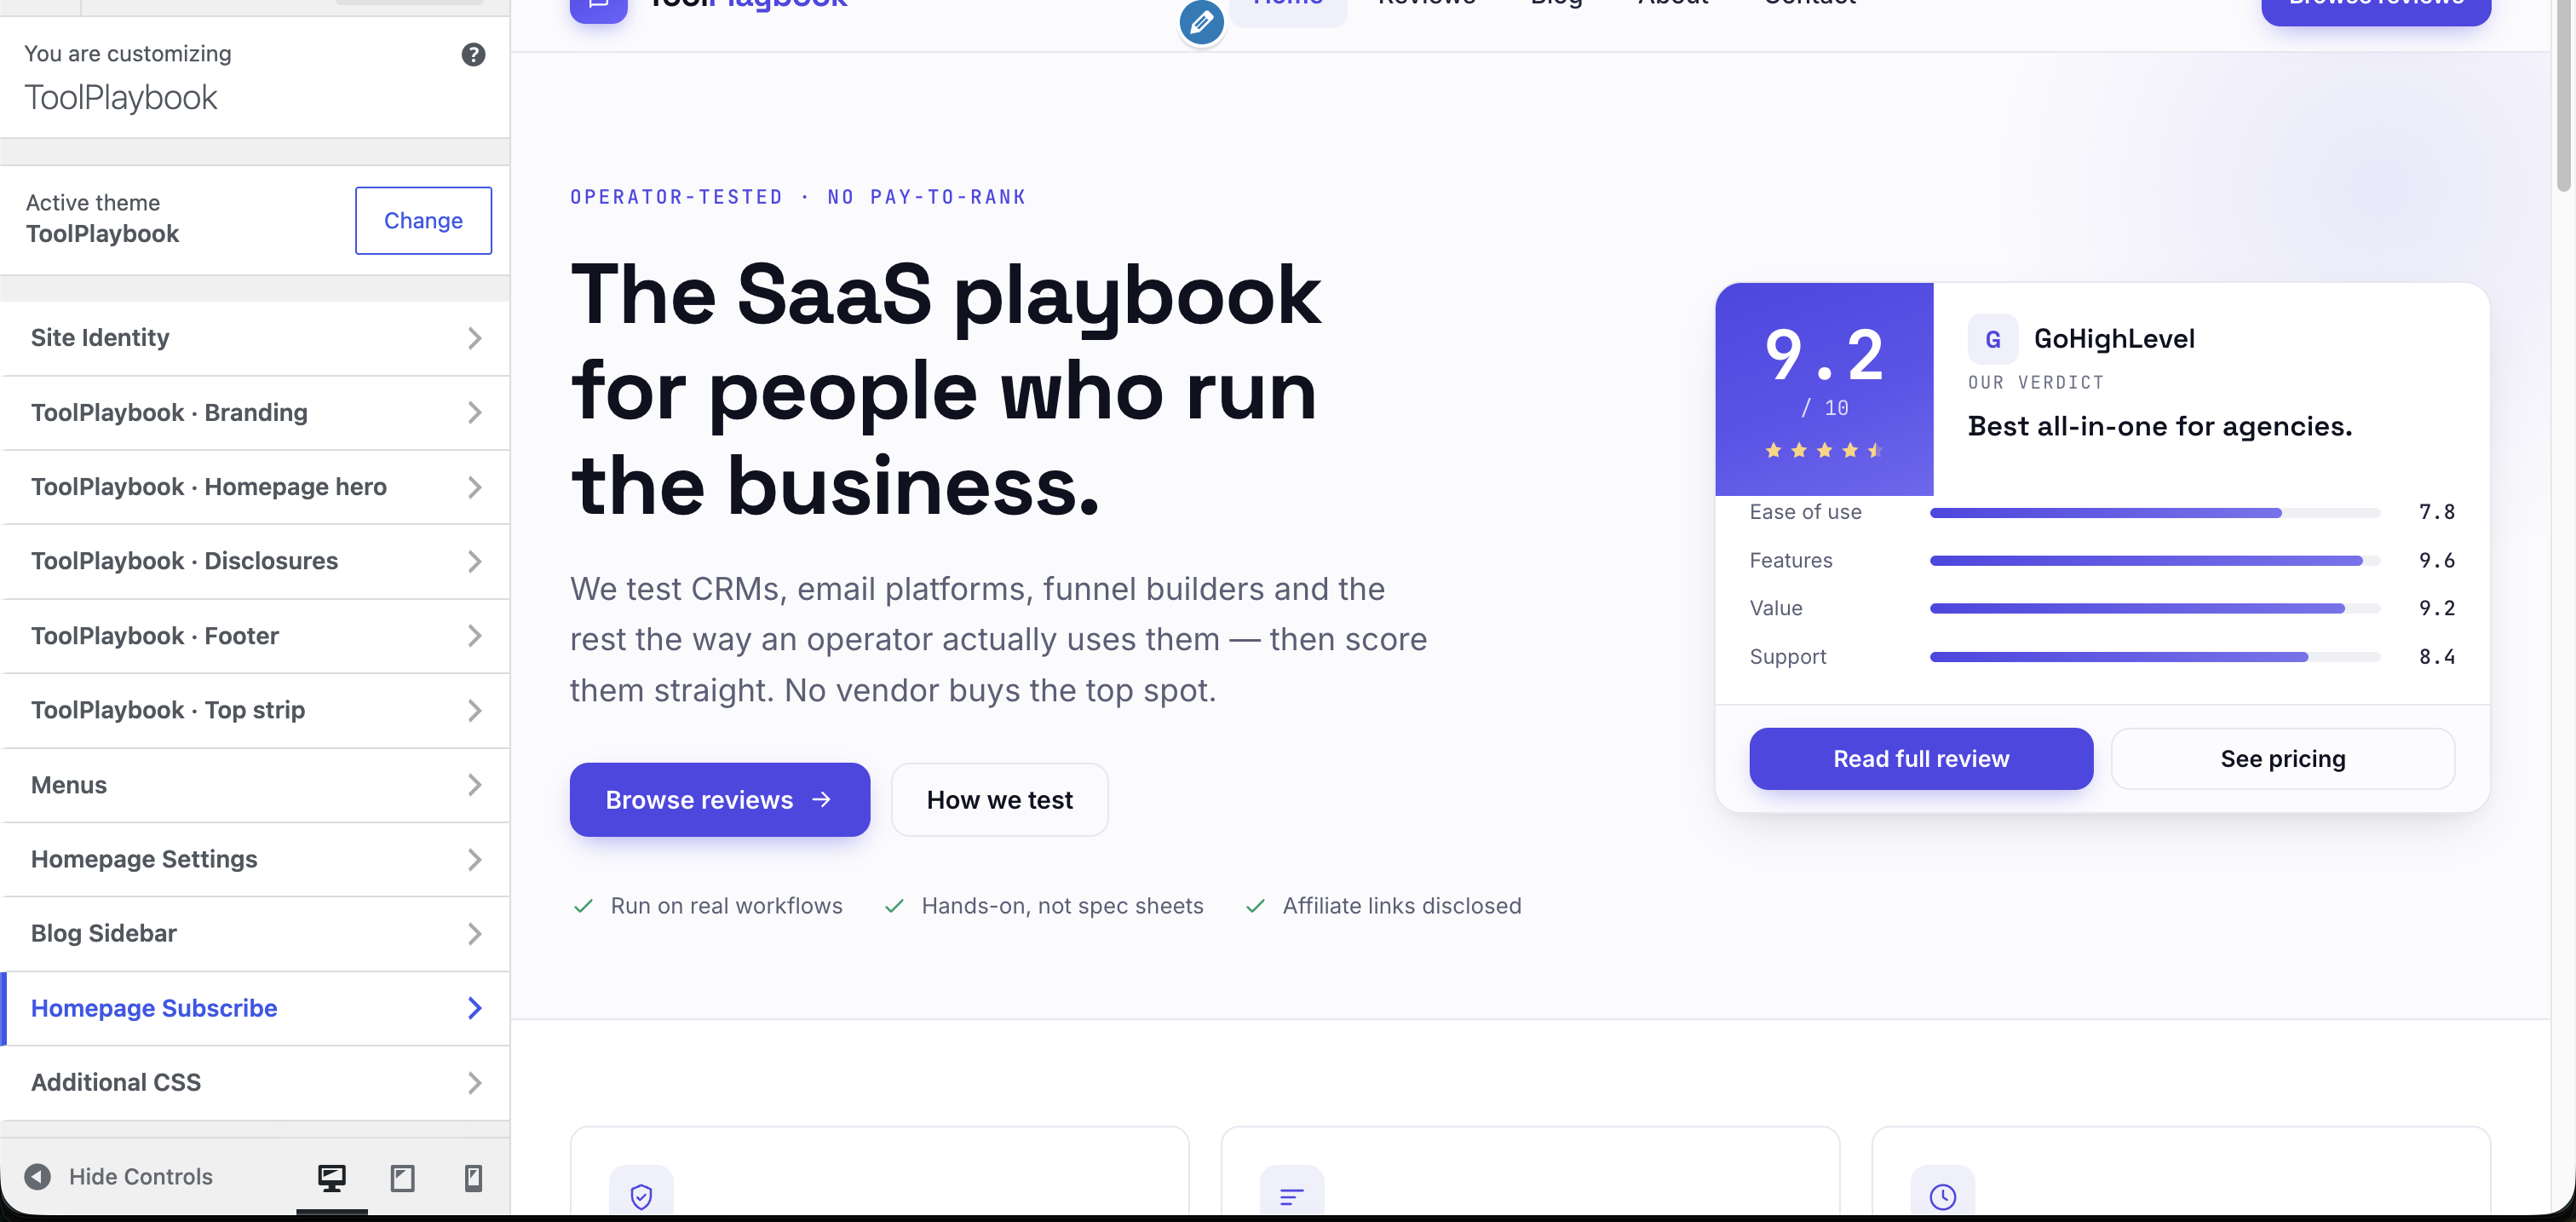
Click Homepage Subscribe to open its settings panel. Fill in the fields:
- Show subscribe section on homepage → Yes
- Headline →
Get the shortlist in your inbox(or your own copy) - Subcopy → your description
- Form shortcode (Fluent CRM / Fluent Forms) → paste
[fluentform id="5"] - Small note (below form) →
No spam. Unsubscribe anytime.(or your own)
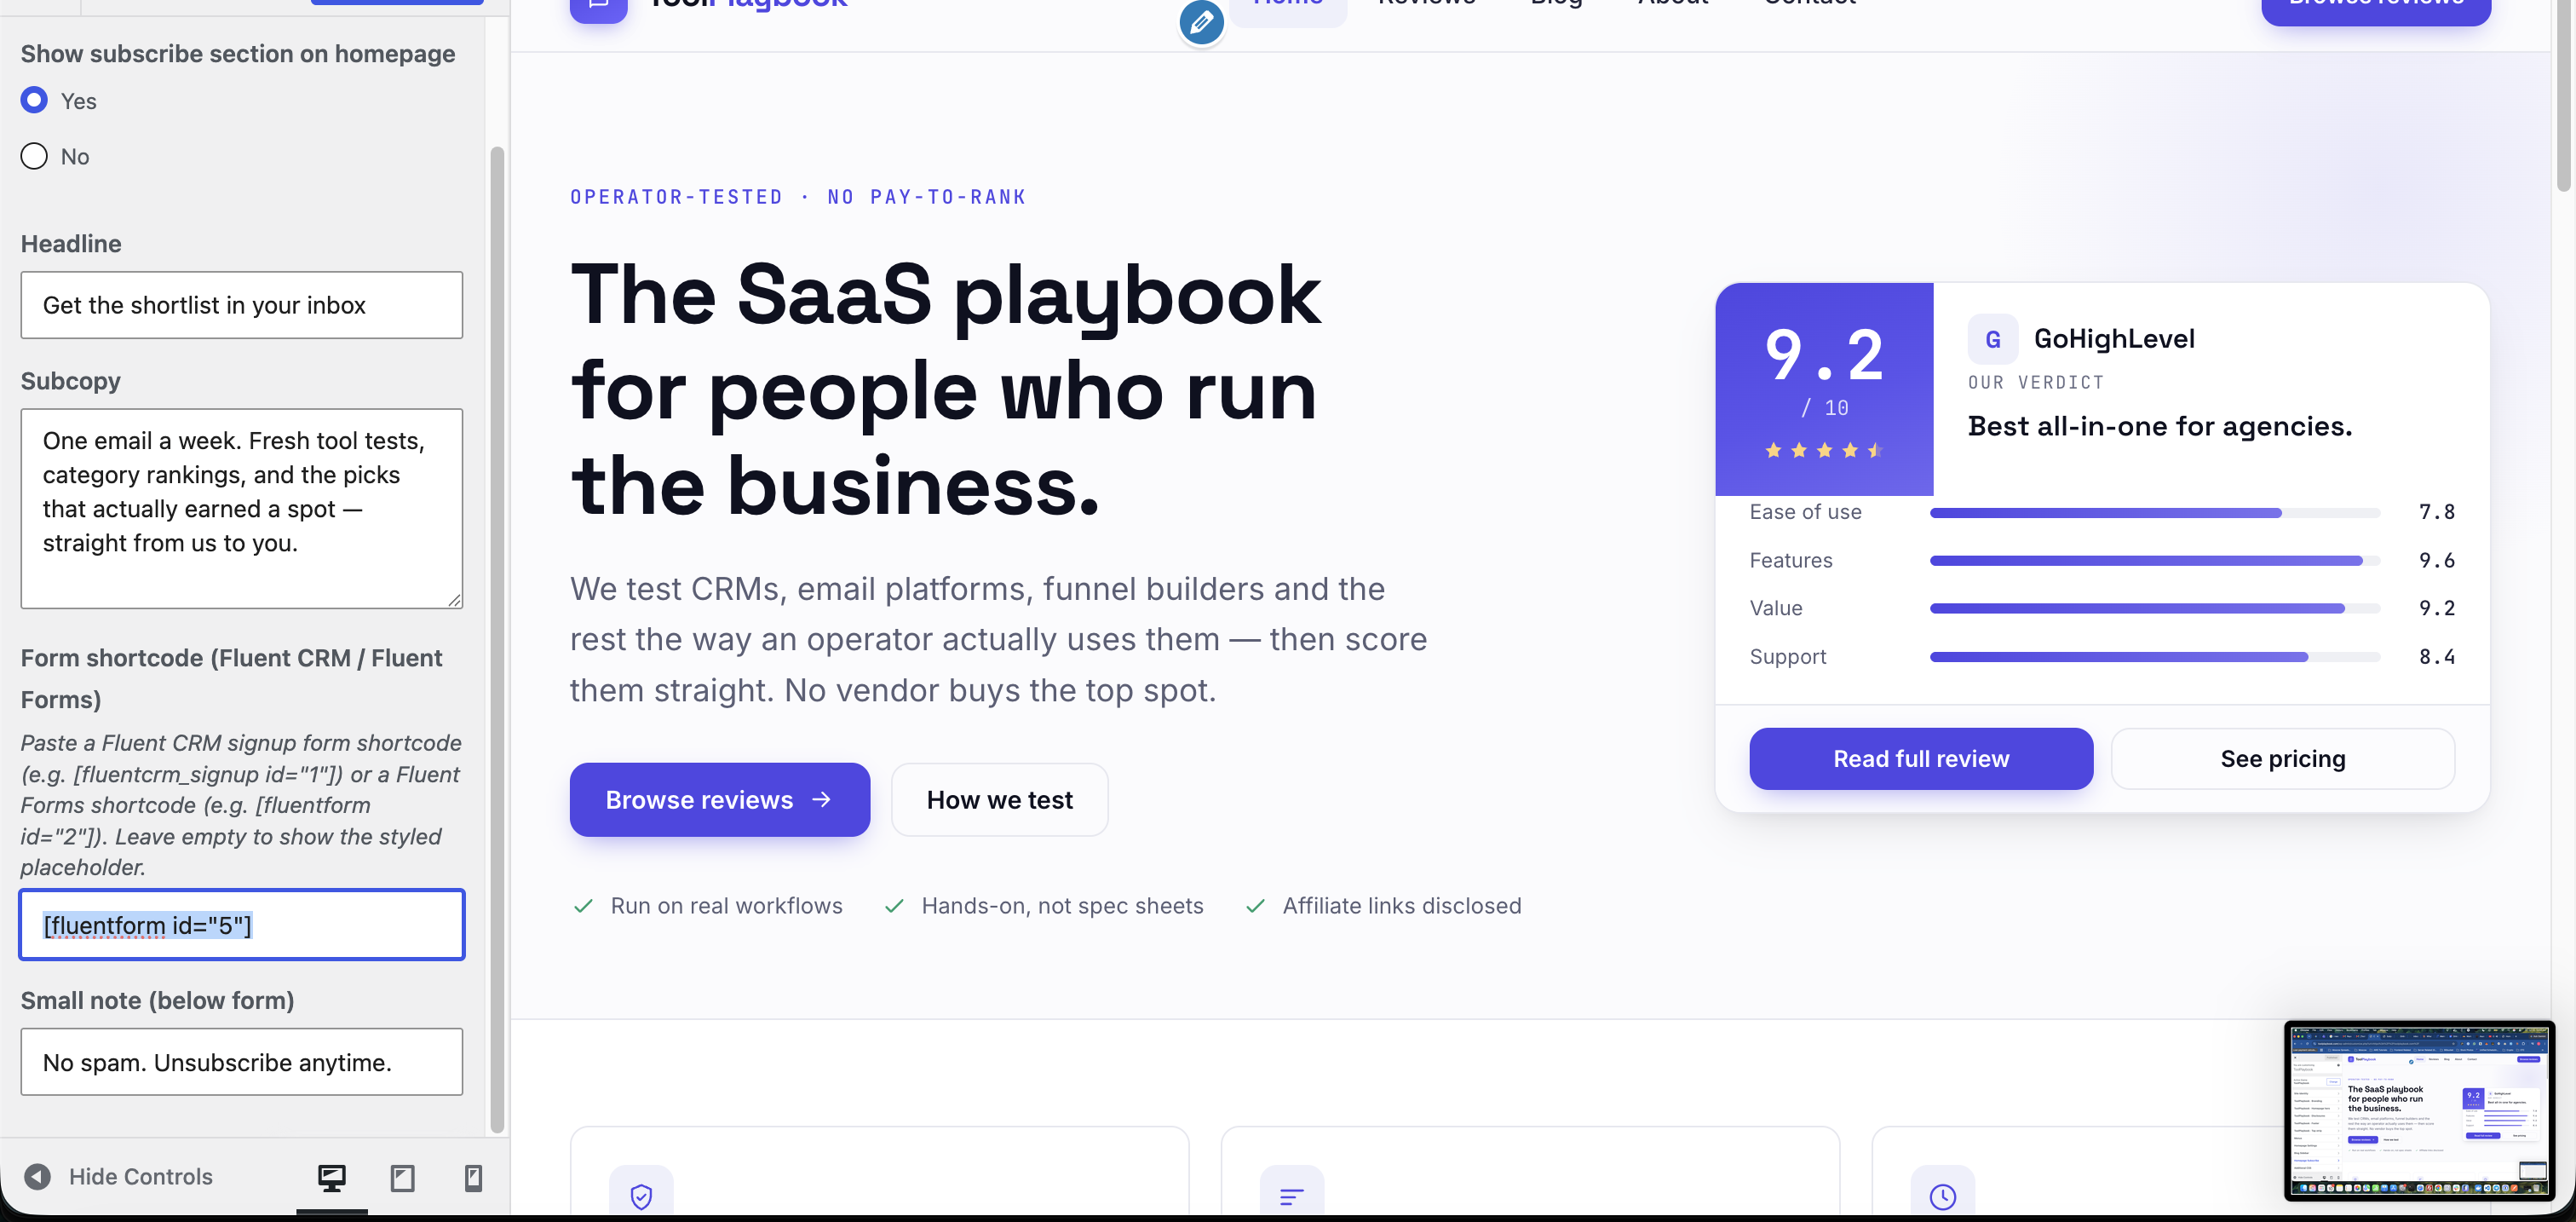
Click Publish at the top of the Customizer.
Visit the homepage and /blog/ — scroll to the bottom — the subscribe band now renders the real Fluent Forms form inside the indigo card in both spots. One Customizer section drives both.
5. Wire it into the blog sidebar
Same shortcode works for the sidebar newsletter card on single blog posts.
WP admin → Appearance → Customize → Blog Sidebar
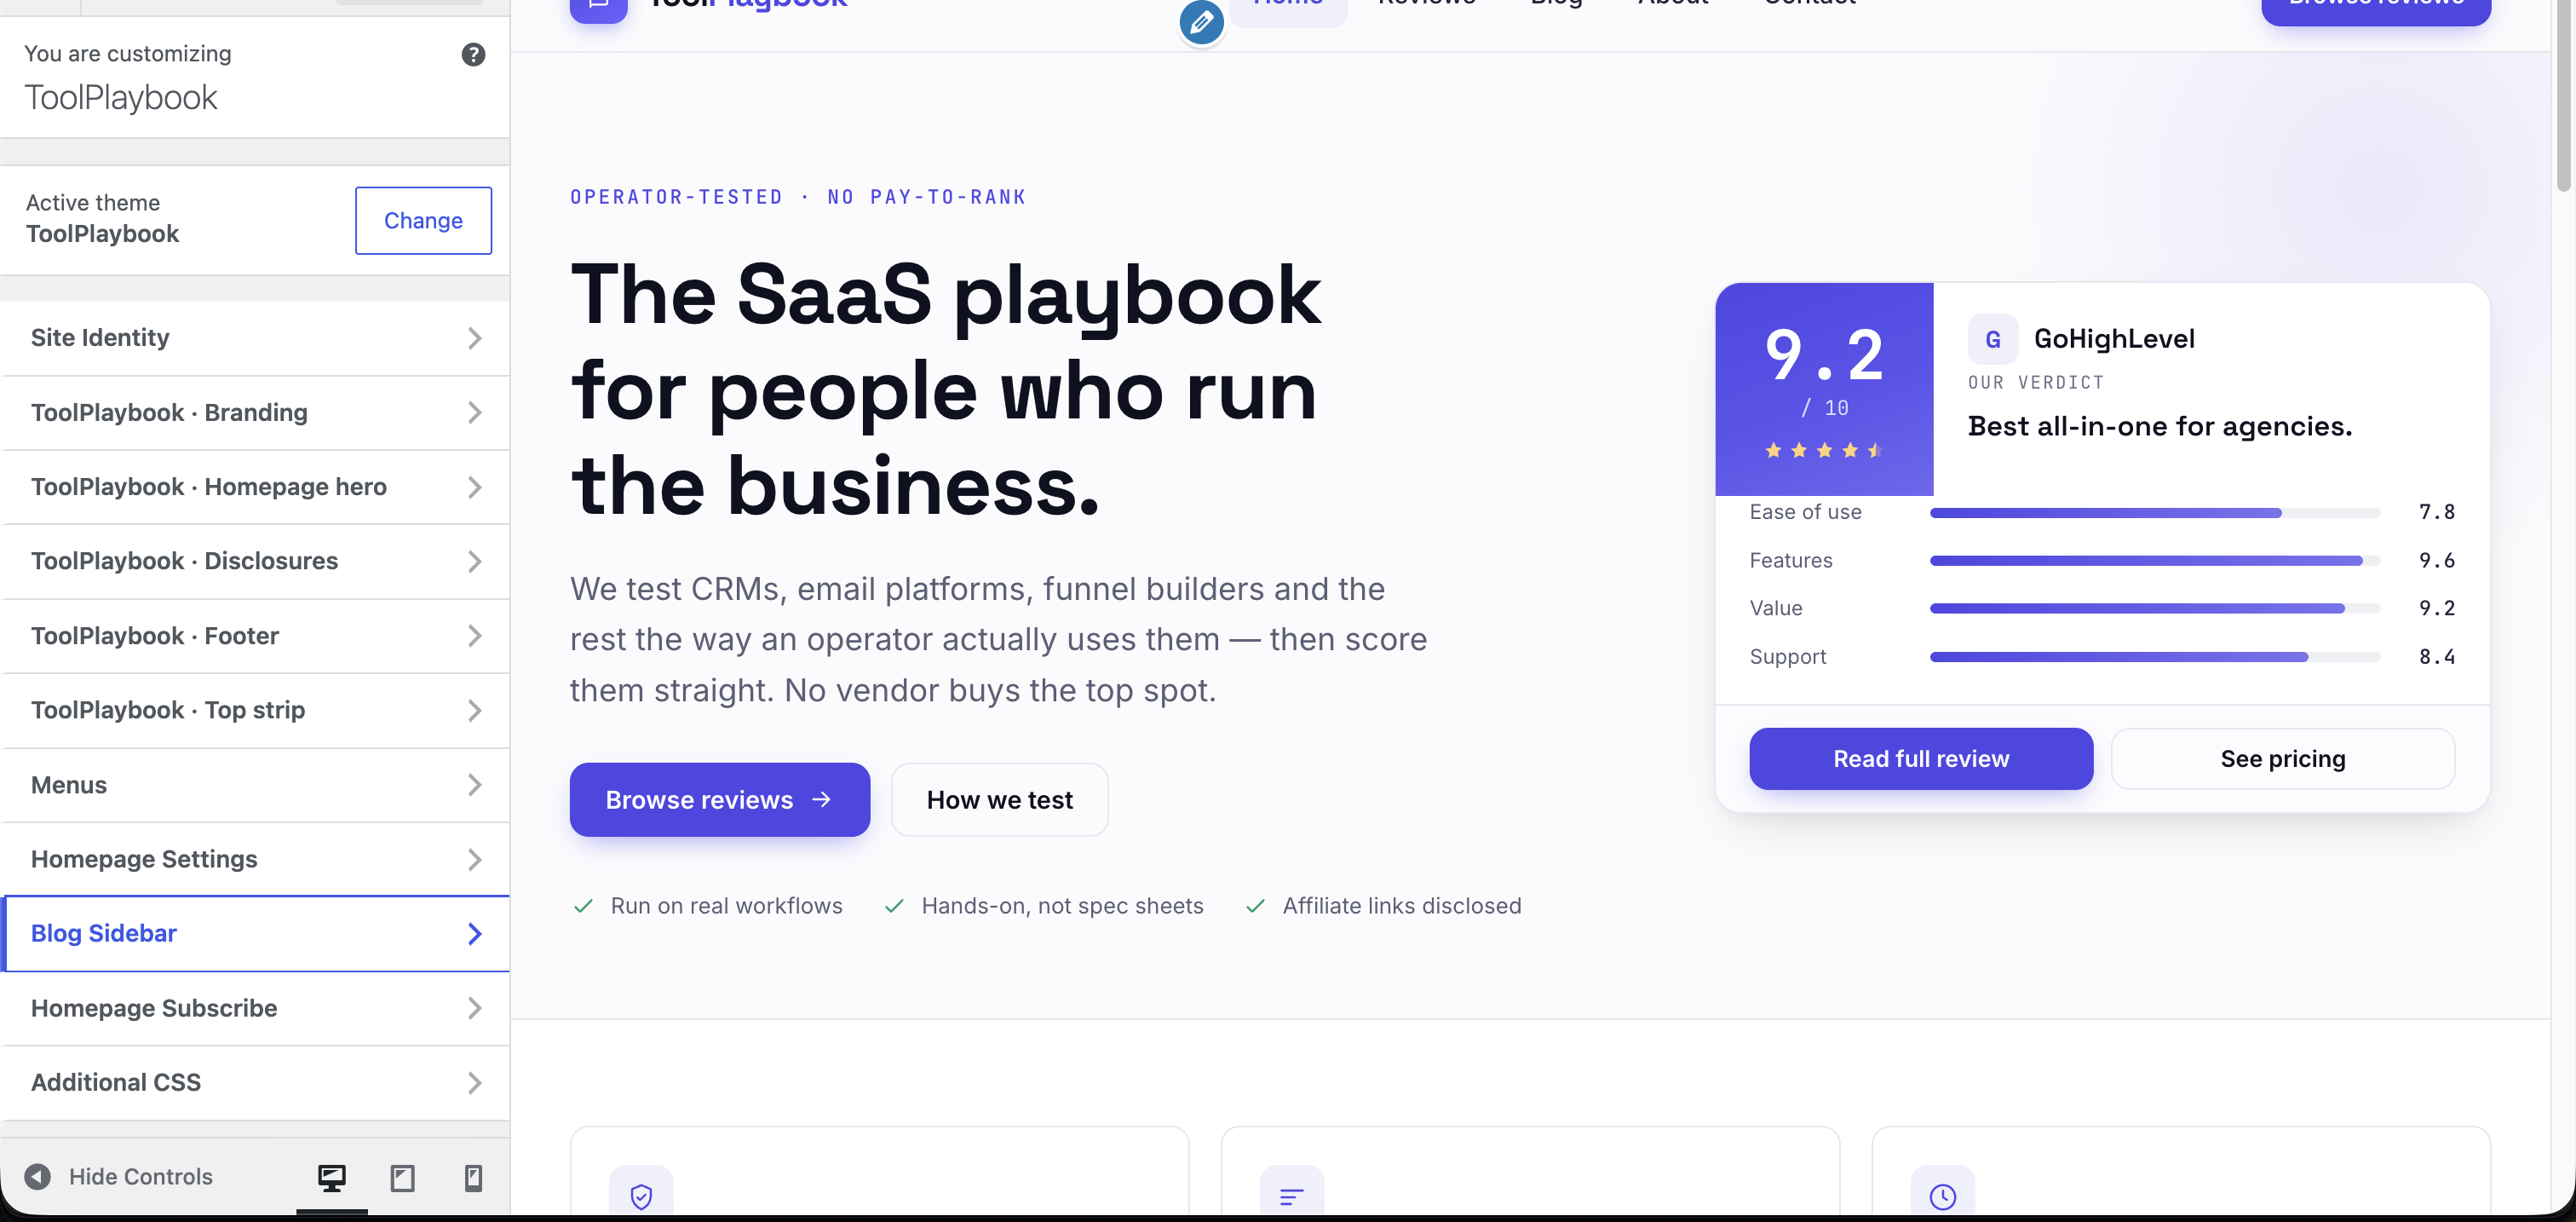
- Newsletter card title →
Get the shortlist(or your own) - Newsletter blurb → your description
- Newsletter form shortcode → paste the same
[fluentform id="5"]
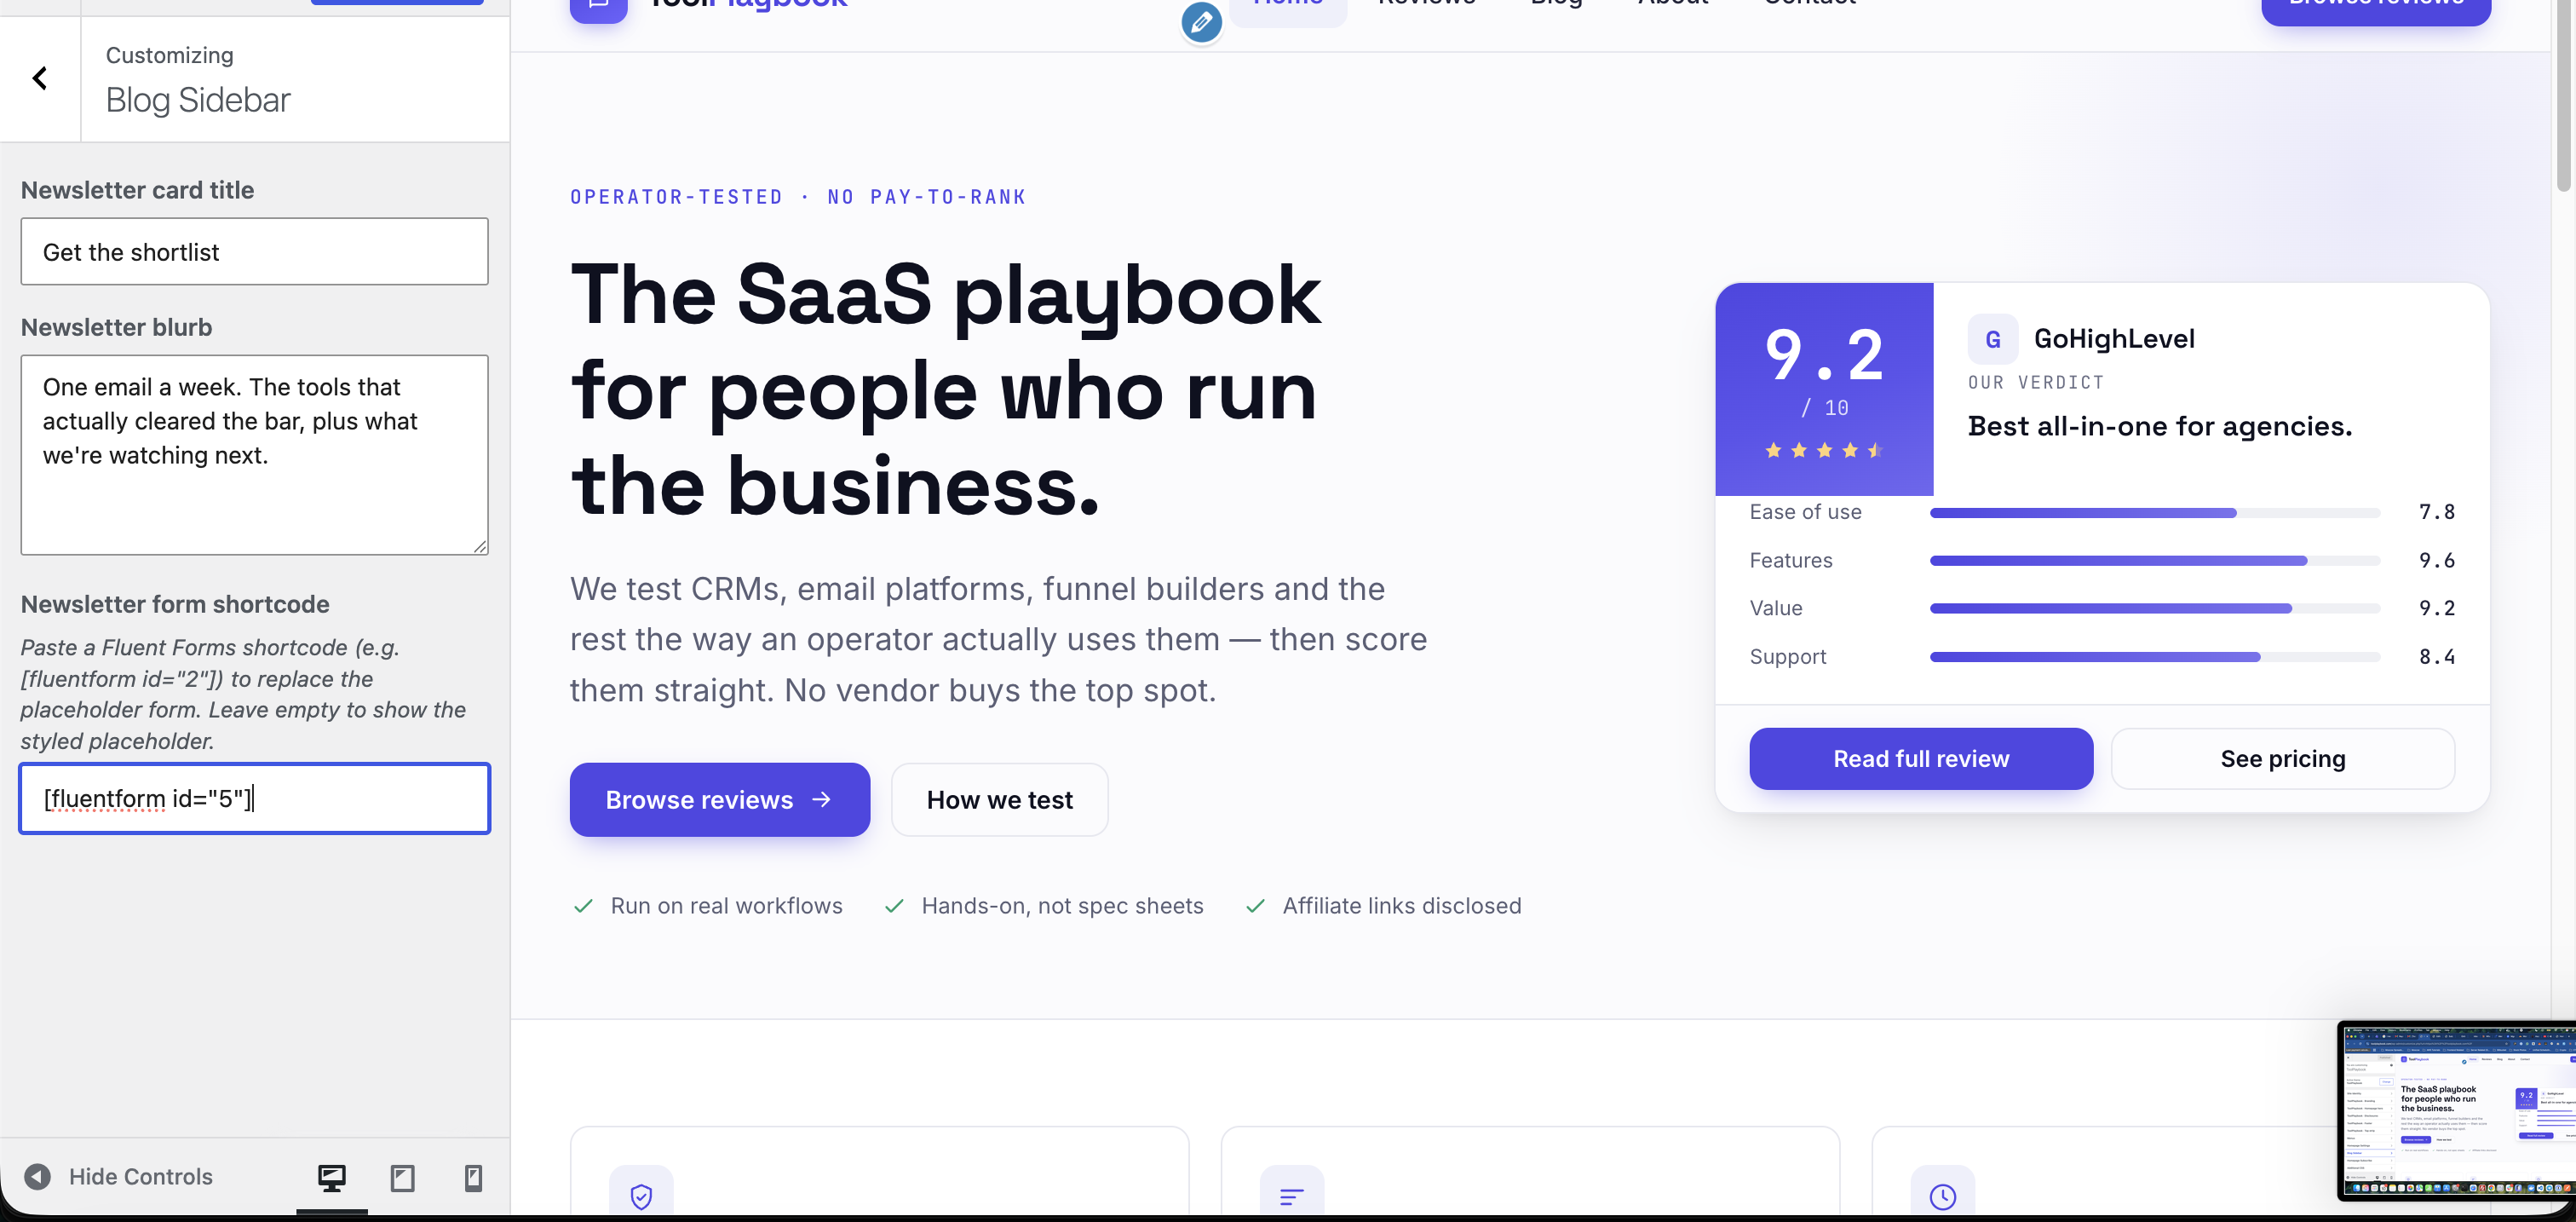
Click Publish.
Open any single blog post — the sidebar's newsletter card now shows the Fluent Forms form. Submissions from both places land in the same Fluent CRM list.
Track signup source
If you want to distinguish homepage subscribers from blog subscribers in Fluent CRM, duplicate the form in Fluent Forms → open the copy → change its Add to Tags to blog-sidebar (create the tag inline) → save → grab its shortcode → paste that one into the Blog Sidebar shortcode field instead. Same list, different tags. You can then filter contacts in Fluent CRM by tag.
Testing end-to-end
- Visit the homepage in an incognito window
- Scroll to the subscribe section
- Enter a real test email you have access to
- Submit
- If Double Opt-in is on → check inbox for confirmation email → click confirm link
- WP admin → FluentCRM → Contacts — your test email should appear in the
Newsletterlist
If the email doesn't show up:
- Double-check the Fluent CRM integration is toggled ON inside the form's settings (Fluent Forms → your form → Settings & Integrations → Marketing & CRM Integrations)
- Confirm the form is publishing to the right list
- Check WP admin → Fluent Forms → All Forms → your form → Entries — if the submission is there but not in Fluent CRM, the integration action isn't wired
Turning the subscribe sections off
If you ever want to hide the homepage subscribe band (without deleting the form or unpublishing anything):
Customize → Homepage Subscribe → Show subscribe section on homepage → No → Publish
The whole section disappears from the homepage. Flip back to Yes anytime.
The blog sidebar newsletter card doesn't have a per-visibility toggle — clear the shortcode field and it renders the styled placeholder (visual only, no submissions). To hide it entirely, you'd remove the whole newsletter card from the sidebar template, which is out of Customizer scope.